
Daily Sourdough Bread
It’s fall again and one reason I love fall is because I have a solarium that gets cold, but not too cold. The temperatures range from 44F/6C – 50F/10C at night(more or less).
Often, to retard a sourdough, we place the dough in the fridge overnight and notice that it isn’t always risen much in the morning (unless you let it set out to proof for a while before retarding). My fridge is 39F and my dough doesn’t usually rise much (unless -see above).
However, in fall I have the opportunity to use my cold room (solarium, which stays cold overnight but warms up a lot once the sun hits it – yea I know good for a warm proofer too!)
The following formula uses a cold room or basement, cold enclosed porch, etc. I even used the trunk of my car one time!
Find a place that stays cool from 44F/6C through 50-55F/10-12C and use it to retard your dough. You will find that the slow cool (not cold) rise will enhance the flavor of the bread considerably. Be prepared to pre-heat your oven first thing in the morning as your dough most likely will be ready to bake.
One more thing, try sprinkling sesame seeds on the bottom of your loaf before you turn it out of the banneton. My daughter Rochelle showed me that tip and I love the hint of sesame and crunch it provides on the bottom crust (make sure the dough is slightly moist so the seeds stick when you turn out your dough OR sprinkle sesame seeds on your parchment paper and turn the dough out onto the parchment paper, once you bake the loaf, the seeds will stick.
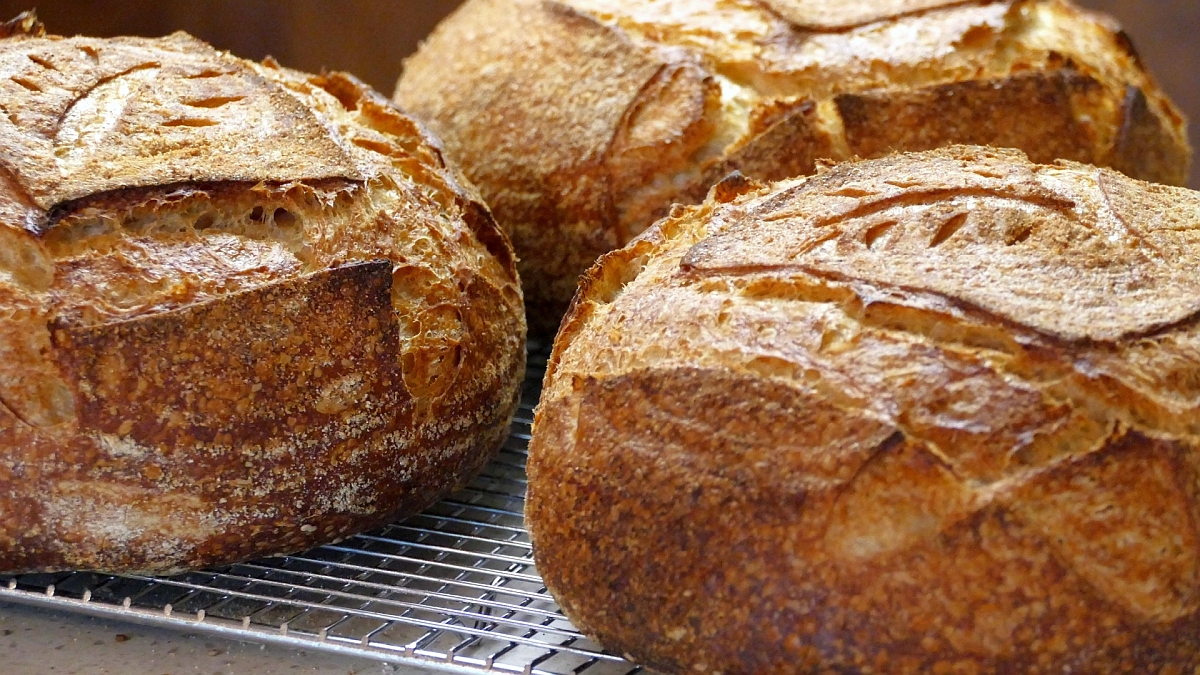
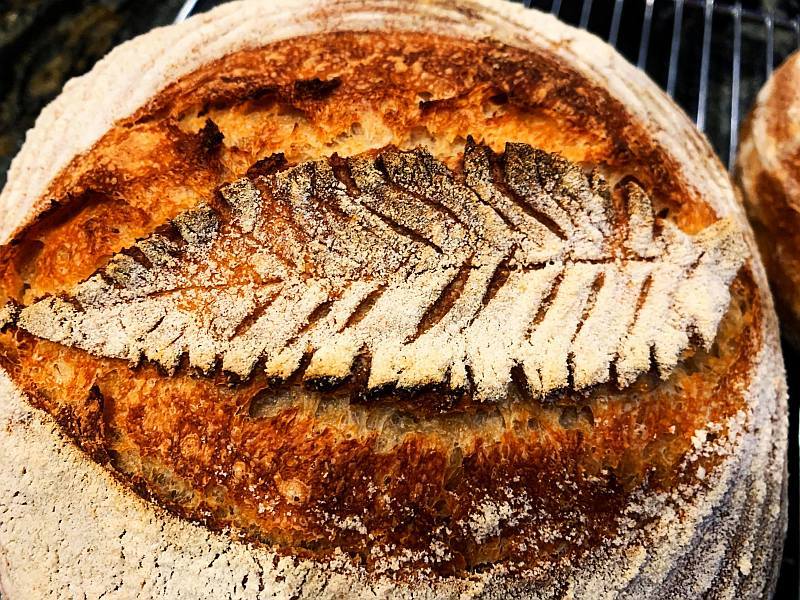
This loaf is a good multipurpose loaf to use for your daily bread. It makes great sandwiches as well as toast.
Notice there is a print option at the top of the following formula:
Weigh the starter and water into a mixing container and stir.

Mix in the whole wheat flour and stir.
Add the bread flour and the salt and mix until the dough is incorporated.

Allow the dough to bulk ferment at room temperature of 70-74F/21-23C.
The dough will take about four hours to bulk ferment.
Fold the dough about every 45 minutes until the last hour. Then allow it to ferment until it is shaped.

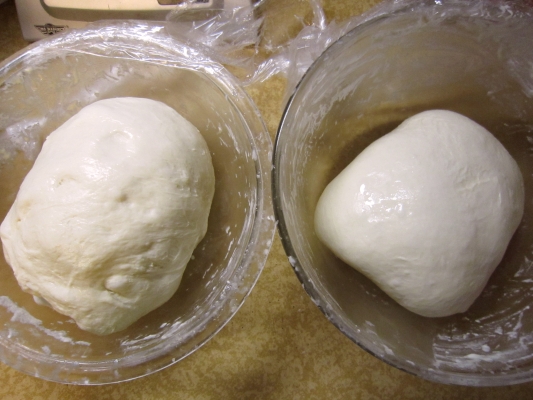
After four hours total(as long as your dough is bubbly, soft, stretchy and filled with bubbles and will pull a nice windowpane, if not allow it to bulk ferment longer) divide the dough into two pieces and do a pre-shape.
After a fifteen minute rest do a final shaping of the dough and place upside down into floured bannetons or lined baskets.

Cover the banneton and dough with a plastic bag and keep in a cool place overnight (around 50F/10C). You will have the dough chilling for about 11-12 hours total. You might try a cold porch, basement or pantry to find a cool place. I even used the trunk of my car once. This formula is good to try in the fall or spring so you can find a cool place.
If you don't have a cool place, use your refrigerator but you might have to add a few hours to the final proofing of the dough once you remove the cold dough from the fridge the next morning.
If you retarded your dough at 50F/10C then your dough will be ready to bake about 11-12 hours later. Check your dough in the morning and if it's nicely risen, start heating your oven/baking stone or Dutch oven to 480F/248C or whatever works for your oven.
Make sure to pre-heat the oven and stone thoroughly, at least for one hour.
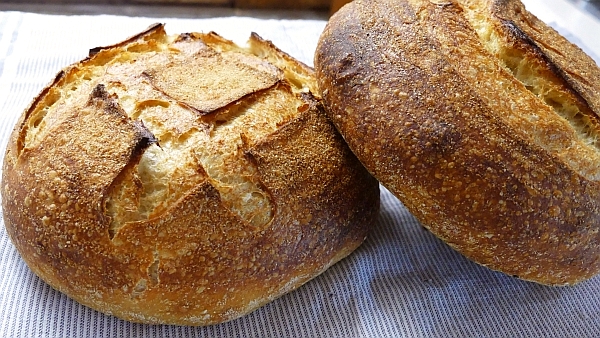
For added flavor, sprinkle some sesame seeds on the bottom of the loaf instead of dusting flour before turning your dough out onto the peel.

Place the dough onto a baking parchment paper/peel or on a peel and score the dough. Slide the dough onto your baking stone and mist the dough lightly with water. Place the lid over the dough.

Bake the loaves for 15 minutes with steam and 20+ minutes without steam or until the crust is nicely browned and the internal temperature is above 210F/98C.

Remove the loaves to a cooling rack and allow to cool before slicing.

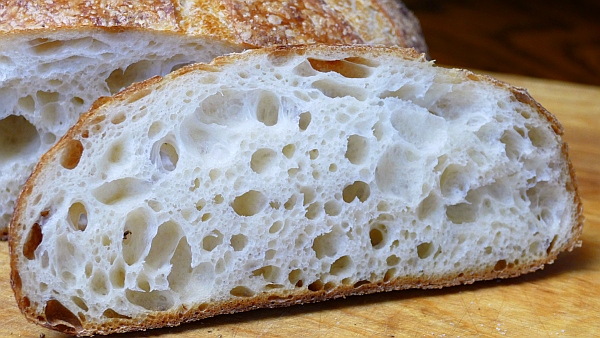
This formula will produce a soft, lovely crumb and a crisp crust with a lovely light tang because of the cool overnight ferment.

Two beautiful loaves with a hint of whole wheat and sesame.
The sesame seeds on the bottom bake in and are a great flavor enhancement when you bite into a slice. This sesame seed bottom crust idea came from Rochelle Greenway (my daughter).

1683 grams of dough at 71.6% hydration. Enough for two loaves at around 840 grams each.
Start mixing the dough in the late afternoon.
Ingredients
If you would like to learn more about baking with sourdough consider joining our membership here: The Baking Network
Responses